

This christmas tree cake recipe turns a simple vanilla layer cake into the centrepiece of your holiday table. Three graduated rounds are stacked, carved into a gentle taper and covered in piped green buttercream, so the finished cake looks like a little evergreen tree, sprinkle ornaments and star included. It slices like a normal layer cake and tastes like the best vanilla birthday cake you have ever made.
The secret is that nothing here is fussy. The batter is a straightforward butter cake, the frosting is a classic American buttercream, and the tree shape comes from stacking an 8-inch, a 6-inch and a 4-inch layer, then trimming the edges into a cone. If you can bake a layer cake and hold a piping bag, you can make this one.
Prep time: 40 minutes · Cook time: 30 minutes · Total time: 3 hours 30 minutes (including cooling, chilling and decorating) · Serves: 16 · A from-scratch vanilla layer cake stacked, carved and piped into the shape of a Christmas tree.
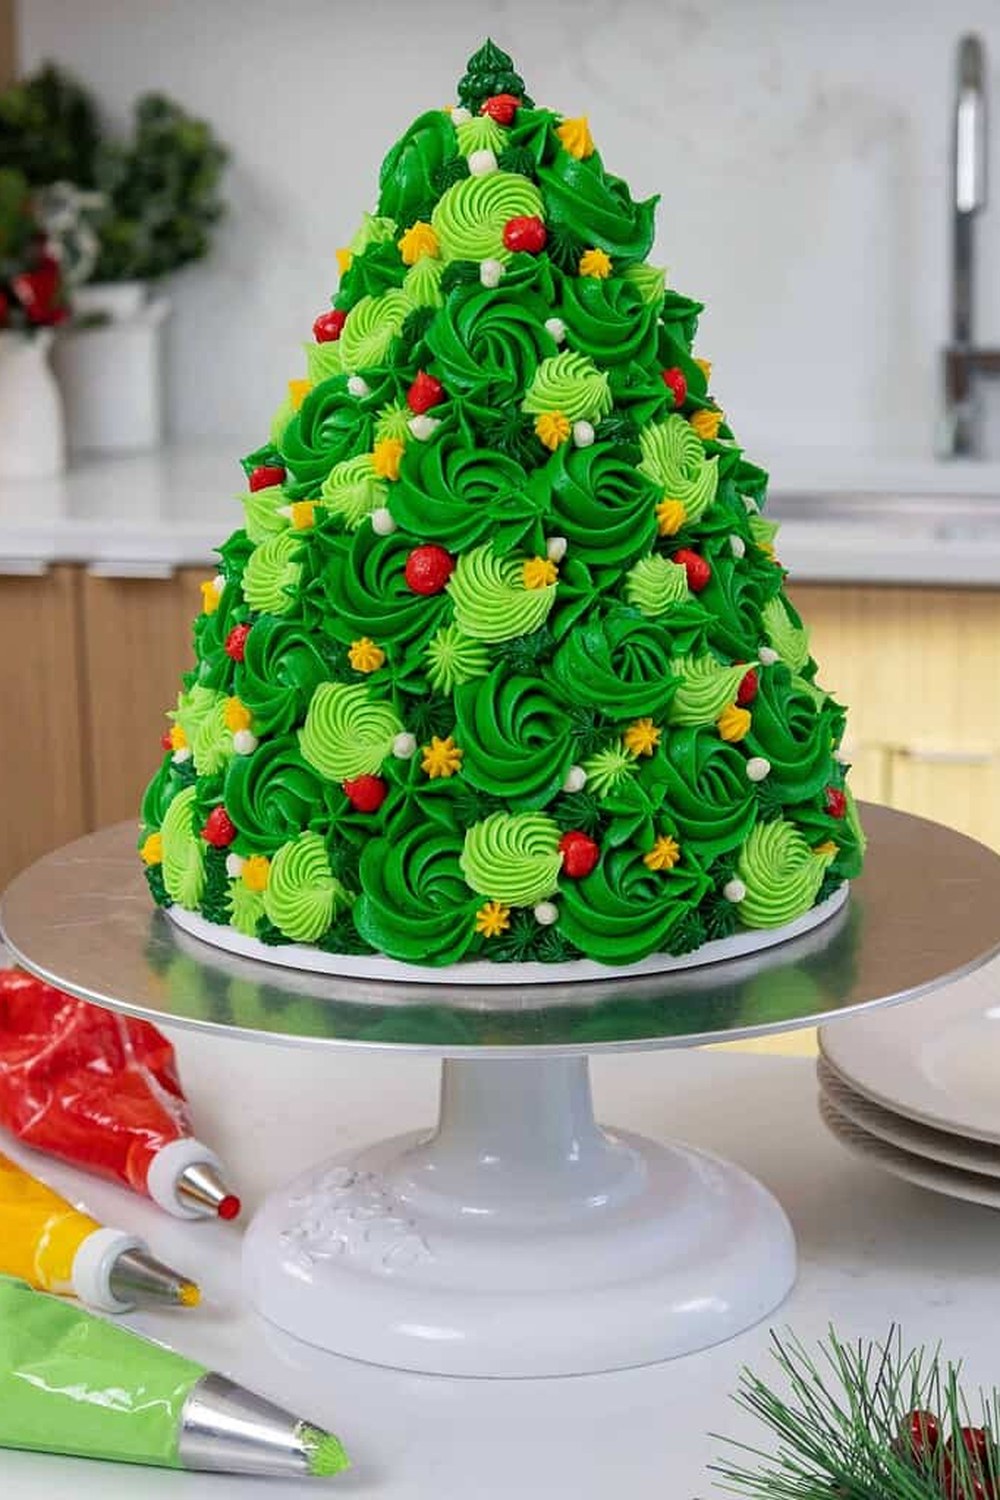
Image credit: Chelsweets / chelsweets.com
Why This Christmas Tree Cake Works
The graduated pans do most of the shaping work for you. Because the layers step down from 8 inches to 6 inches to 4 inches, the stack already has a tree-like silhouette before you ever pick up a knife — carving just softens the steps into a smooth taper. No special mould, no template, and nothing is wasted: the trimmings get mixed with a little buttercream and pressed into a small cone for the pointed tip.
The cake itself is built to be carved: a butter cake made with sour cream is moist but firm enough to hold a clean edge, and chilling the stack before carving makes the crumb steadier still. A thin crumb coat locks in every loose crumb, a 30-minute chill sets it firm, and the final piping hides any uneven spot.
Ingredients
For the vanilla cake:
- 3 cups (375 g) all-purpose flour
- 2 teaspoons baking powder
- ½ teaspoon baking soda
- ½ teaspoon fine salt
- 1 cup (226 g) unsalted butter, softened
- 1¾ cups (350 g) granulated sugar
- 4 large eggs, at room temperature
- 1 tablespoon pure vanilla extract
- 1 cup (240 ml) whole milk, at room temperature
- ½ cup (120 g) sour cream, at room temperature
For the vanilla buttercream:
- 1½ cups (340 g) unsalted butter, softened
- 5 cups (600 g) powdered sugar, sifted
- 2 tablespoons heavy cream or milk
- 2 teaspoons pure vanilla extract
- Pinch of fine salt
- Green gel food colouring
For decorating:
- Sprinkles and sugar pearls
- Mini candy ornaments or red and gold sugar balls
- 1 star topper (a fondant star or a small cookie star)
- 1 wooden dowel or long skewer, cut to the height of the stacked cake
A few notes on choices. Room-temperature eggs, milk and sour cream matter here: cold dairy makes the batter curdle and bake unevenly, so set everything out an hour before you start. Use gel food colouring, not liquid — gel gives a deep evergreen colour without thinning the buttercream. If you only own one 8-inch pan, bake in batches and cut the smaller rounds from extra layers with a plate as a guide.
How to Make a Christmas Tree Cake
- Prepare the pans and the dry ingredients. Heat the oven to 350°F (175°C). Grease an 8-inch, a 6-inch and a 4-inch round cake pan and line the bottoms with parchment. Whisk the flour, baking powder, baking soda and salt together in a medium bowl and set it aside.
- Make the batter. Beat the softened butter and sugar in a large bowl or stand mixer on medium speed for 3 to 4 minutes, until pale and fluffy. Beat in the eggs one at a time, then the vanilla. Stir the milk and sour cream together in a jug. Add the dry ingredients in three parts, alternating with the milk mixture, beginning and ending with the dry ingredients, and mix on low just until the flour disappears. Do not overmix — overmixing makes a tough cake that crumbles when you carve it.
- Bake and cool. Divide the batter between the pans — about half in the 8-inch, a third in the 6-inch and the rest in the 4-inch — and smooth the tops. Bake for 25 to 30 minutes, until the tops spring back when pressed lightly and a toothpick in the centre comes out clean. Check the 4-inch pan at 20 minutes, since the smallest layer bakes fastest. Cool in the pans for 15 minutes, then turn out onto a wire rack and cool completely, about 1 hour. Never stack or carve a warm cake — it will tear and slide.

Image credit: Susan Brings Dessert / susanbringsdessert.com
- Make the buttercream. Beat the softened butter on medium speed for 2 minutes until creamy. Add the sifted powdered sugar in two or three additions, beating on low at first, then on medium until fluffy. Beat in the cream, vanilla and salt, then beat for 2 more minutes until pale and spreadable. Set aside about 1½ cups — it stays white for the filling, the crumb coat and snowy garlands. Tint the rest with green gel food colouring, a drop or two at a time, until you reach a rich evergreen shade. If the buttercream feels too soft to pipe, chill it for 15 minutes; it should hold a peak on the beater.

Image credit: Chelsweets / chelsweets.com
- Stack, dowel and carve. Level the tops of the cooled layers with a long serrated knife. Set the 8-inch layer on a cake board, spread on white buttercream, add the 6-inch layer, spread more buttercream, then add the 4-inch layer. Push the dowel or skewer down through the centre of the whole stack, from the top to the board — this keeps a tall, carved cake from leaning. Now carve: hold the serrated knife at a slight angle and trim the outer edges of each layer into a smooth, tapered cone, working from the bottom up and turning the cake as you go. Save the trimmings, mash them with a spoonful of buttercream, and press the mixture into a small cone on top of the 4-inch layer for a pointed tip.

Image credit: Los Muertos Crew / Pexels
- Crumb coat, chill and pipe. Spread a thin layer of the reserved white buttercream over the carved tree, just enough to trap the crumbs, and refrigerate for 30 minutes until firm. Fit a piping bag with a large open-star tip and fill it with the green buttercream. Starting at the base, pipe rows of shells or rosettes all the way around, working upward and overlapping each row slightly so no white shows through. Pipe a little extra at the very top to sharpen the point. The piping is forgiving: shells, stars and rosettes all read as tree branches, so use whichever motion feels comfortable.

Image credit: Tara Winstead / Pexels
- Decorate and serve. While the buttercream is still soft, press on the sprinkles, sugar pearls and candy ornaments like baubles. Pipe a few dots or a zigzag of the reserved white buttercream between the rows for a snowy garland, then set the star on top. Rest the cake at room temperature for 20 minutes before slicing, and cut with a long, sharp knife dipped in hot water and wiped clean between slices.
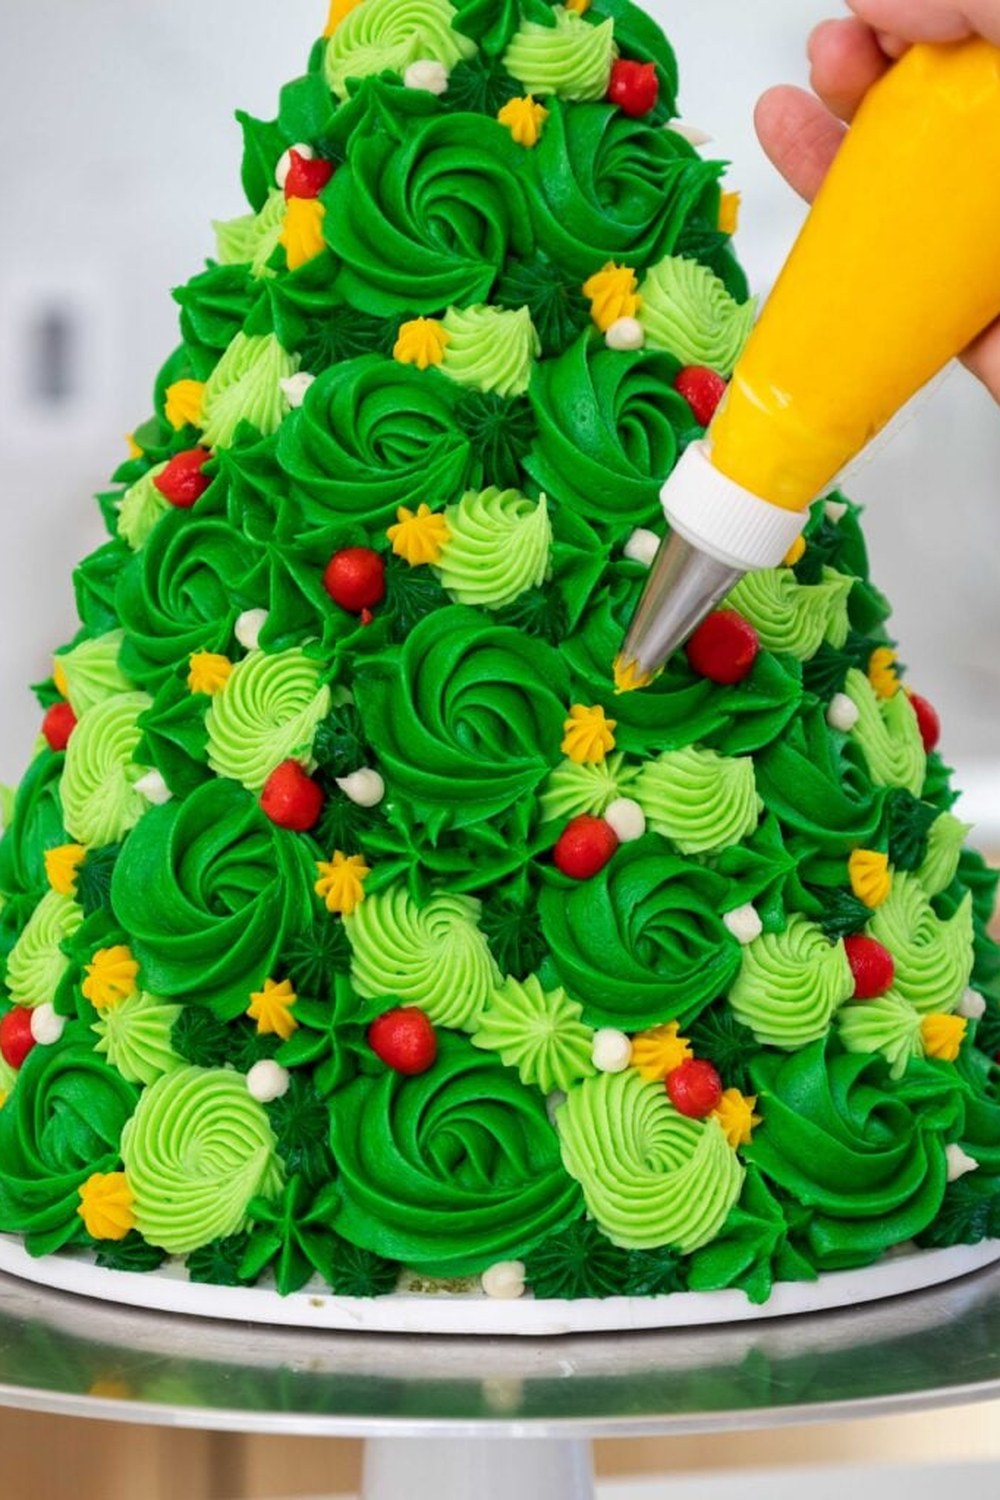
Image credit: Chelsweets / chelsweets.com
Variations: Chocolate, Red Velvet, Spice and Snowy White
Chocolate Christmas tree cake. Replace ½ cup of the flour with ½ cup of unsweetened cocoa powder and add ¼ cup of extra milk to keep the batter loose. The dark crumb contrasts beautifully with the green frosting.
Red velvet Christmas tree cake. Add 2 tablespoons of cocoa powder and 2 tablespoons of red gel food colouring to the batter, and swap the sour cream for buttermilk. The red crumb is a lovely surprise inside a green tree.
Spiced Christmas tree cake. Add 1 teaspoon of ground cinnamon, ½ teaspoon of ground ginger and ¼ teaspoon of ground nutmeg to the dry ingredients, and replace half the granulated sugar with light brown sugar. The warm spice smells like Christmas morning.
Snowy white Christmas tree cake. Skip the green food colouring and pipe the whole tree in white buttercream, then press shredded coconut over the piping for snow and decorate with silver sugar pearls and a white star. Same cake, different mood — elegant and wintry.
Toppings and Serving Ideas
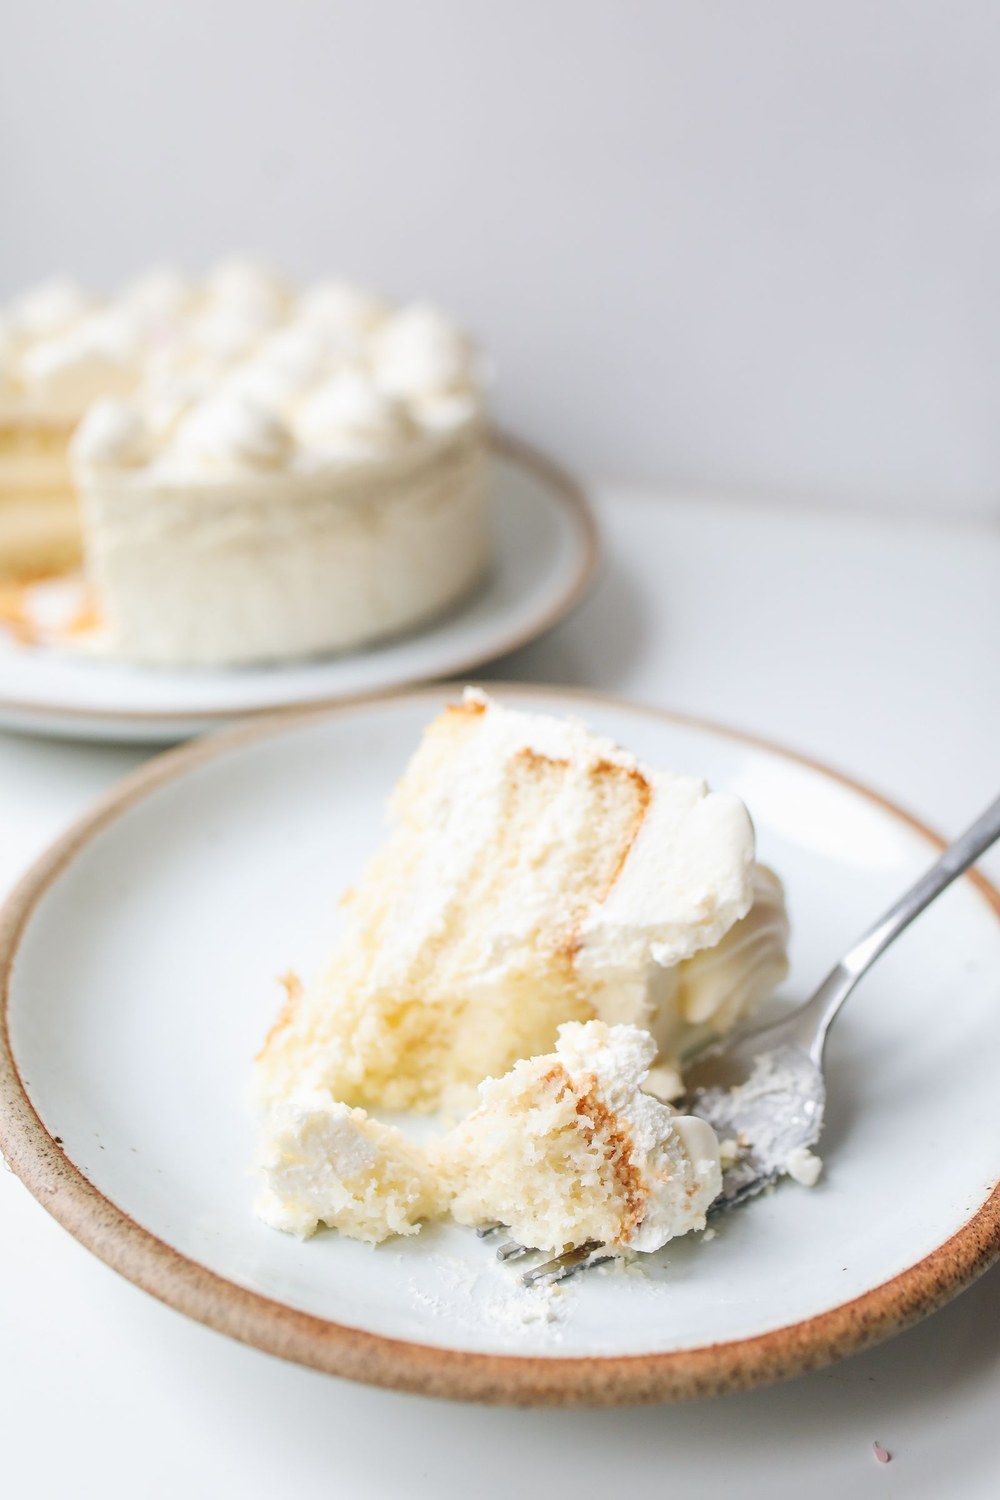
Image credit: Polina Tankilevitch / Pexels
Half the fun of this cake is the moment it is cut, so serve it where everyone can watch. A tall cake stand shows off the tree shape best, and rosemary sprigs or cranberries around the base turn the plate into a little winter scene — keep them on the stand, not on the cake. Slice from the top down in thin wedges; the first few slices are small, so start at the base if you want even portions for a crowd.
- The classic: a slice on its own, with the green piping and ornaments still visible on the plate
- With ice cream: vanilla or peppermint ice cream alongside each slice
- With hot chocolate: a mug of cocoa or mulled cider turns the cake into a Christmas Eve dessert
- With whipped cream and berries: softly whipped cream and fresh raspberries or cranberries cut the sweetness
- For a crowd: slice the base layers into small squares once the tree has been admired — one cake easily serves 16
Storage and Freezing
This cake keeps best in the fridge, lightly covered. Once decorated, store it in a tall cake box or under a large upturned bowl for up to 3 days — let slices sit at room temperature for 20 to 30 minutes before serving so the cold buttercream softens. Leftover slices keep in an airtight container for the same 3 days.
For longer storage, freeze the unfrosted layers rather than the finished cake. Wrap each cooled layer tightly in plastic wrap, then in foil, and freeze for up to 3 months; thaw overnight in the fridge before stacking. The finished cake can be frozen too — chill uncovered for an hour until the buttercream is hard, then wrap and freeze for up to 2 months — but the piping never looks quite as crisp after thawing.
Christmas Tree Cake Questions
Can I make this Christmas tree cake ahead of time? Yes, and it is easier that way. Bake the layers up to 2 days ahead and keep them wrapped in the fridge, or freeze them for up to 3 months. Make the buttercream 3 days ahead and refrigerate it — bring it to room temperature and re-whip before using. Assemble and decorate the day before serving, refrigerate overnight, and bring to room temperature 30 minutes before cutting.
Can I use a box cake mix instead? Yes. Two boxes of vanilla cake mix give about the right amount of batter for the three pan sizes — prepare both per the package directions, then divide as in step 3 (use any extra batter for a few cupcakes). A mix makes a softer crumb than this from-scratch recipe, so chill the baked layers well before carving and do not skip the central dowel.
How do I keep the tree from leaning? Three habits prevent a lean: level every layer flat before stacking, keep the buttercream between the layers thin and even, and push a dowel or skewer through the centre of the finished stack. A 30-minute chill before piping firms the buttercream and locks everything in place — and once the piping is on, a small lean is invisible.
Tips for the Best Christmas Tree Cake
Chill the layers before you carve. A cold cake cuts cleanly and a warm one crumbles, so refrigerate the stacked layers for 30 minutes before you pick up the serrated knife — it is the single biggest difference between a smooth taper and a ragged one. Keep the buttercream firm, not soft. Buttercream that is too warm slides off a tall cake and loses its piped shape, so if your kitchen is warm, chill the bowl for 15 minutes and re-whip it before piping; it should hold a peak and feel like thick peanut butter. Pipe from the bottom up, row by row. Starting at the base means each new row overlaps the one below it, which hides gaps and gives the tree its full, layered look — and if a row goes wobbly, the row above it covers the mistake. Decorate while the frosting is still soft. Sprinkles and sugar pearls need tacky buttercream to grip onto, so press the ornaments on within a few minutes of piping, before the surface starts to crust. Follow those four habits and your christmas tree cake recipe will come out tall, straight and beautiful every single time.